
- Catalogs
- Allen Farm Equipment
- MODEL 8803

MODEL 8803

MODEL 8803
This manual provides comprehensive guidance for the Allen 8803 Unitized Twin Hay Rake, covering safety, operation, maintenance, and assembly instructions.
Emphasizes the importance of safety symbols and signal words such as DANGER, WARNING, and CAUTION. Operators are advised to follow all safety instructions, maintain the machine in proper working condition, and be prepared for emergencies. Key safety precautions include avoiding high-pressure fluids, ensuring proper hitching, and adhering to speed limits.
The 8803 Rake is a hydraulically driven unit designed for heavy-duty applications. It features extendable frames for raking and retractable frames for transport. The rake is controlled via manual levers or an electric control panel.
The rake is shipped partially assembled. Safety precautions during unloading and assembly are highlighted. A pre-delivery checklist ensures all components are correctly assembled and operational before delivery.
Details on jack operation, hitching, frame height adjustment, and transporting the rake. Instructions for motor reversal, hydraulic functions, and manual adjustments for basket angle and tilt are provided.
Outlines various maintenance procedures to ensure the rake's longevity and performance. Includes a wiring diagram and troubleshooting guide.
A comprehensive list of parts for the 8803 Rake, aiding in repairs and replacements.
- Regularly inspect and maintain the rake to prevent accidents and ensure efficient operation.
- Follow all safety guidelines and use appropriate safety attire.
- Ensure hydraulic systems are free of leaks and operate within specified pressure limits.
- Complete warranty registration for validation.
This section emphasizes the importance of reading all safety messages before proceeding with any setup procedures. It highlights the necessity of preliminary hydraulic settings for the ALLEN rake, referencing the "PRE DELIVERY AND DELIVERY LIST" for guidance. Proper hydraulic adjustments are crucial to prevent damage during hay raking.
Instructions for safely hitching and unhitching the rake are provided, stressing the use of a proper hitch pin with a safety clip. The section advises parking on flat ground and using chocks to prevent rolling.
The manual specifies that the frame should be level with the ground at a nominal height of 58 inches. Adjustments can be made using bolt holes on the rake tongue, and proper torque is essential.
Safety instructions for transporting the rake include using a hitch pin with a safety clip, not exceeding 20 mph, and ensuring all parts are secure to prevent accidents. Operators must follow local traffic laws and ensure the machine is properly hitched before transport.
This section covers the potential issue of reversed hydraulic hoses causing motor rotation issues. It provides instructions for reversing hoses and details the operation of the hydraulic control box for raking functions.
Guidance is given on adjusting basket angle and tilt to achieve desired windrow characteristics. The section advises on loosening and tightening mechanisms to adjust the basket's position relative to the ground.
Before adjusting tines, the rake must be properly hitched, and frame height set. Instructions are provided for adjusting the tines to maintain a minimum distance from the ground, reducing potential damage.
The manual describes various raking positions to handle different crop conditions, including turning and combining windrows. It also explains the tedding position for lifting and moving crops to dry ground.
This document provides detailed operational and safety instructions for the 8803 Rake, a piece of agricultural machinery designed for handling hay. It includes specifications, procedures, safety warnings, and maintenance guidelines.
The 8803 Rake is equipped with adjustable features to handle various tasks such as creating fluffy or tight windrows and combining multiple windrows. It includes a 360-degree swivel swing arm for flexibility in raking positions.
- Avoid wearing loose clothing that could get caught in machinery.
- High-pressure fluids can cause serious injury; ensure all hydraulic connections are secure and pressure is relieved before disconnecting.
- Always shut off the tractor before connecting or disconnecting hydraulic lines.
- Personnel must be properly trained and free from impairments.
The rake allows for various configurations, including turning two windrows out by adjusting the basket positions. This involves repositioning the baskets and reconnecting hydraulic hoses.
Start-Up
- Review all safety messages and ensure the rake is properly hitched to the tractor.
- Inspect the machine and ensure hydraulic systems are correctly set.
- Start the tractor and gradually increase engine speed to operational levels.
- Adjust the basket angle and telescoping extension arms to maintain the desired windrow width.
- Ensure baskets rotate at 85-90 RPM.
- Adjust ground speed and basket settings according to hay conditions.
- Operate the rake hydraulic system as needed before shutting off.
- Secure the tractor and review relevant sections for the next operation.
- Familiarize yourself with all safety information and emergency contacts.
- In emergencies, quickly assess the situation and take appropriate action, such as shutting off machinery.
- Always prioritize safety to prevent further injury or damage.
Proper hydraulic settings are crucial for optimal rake performance. Ensure the tractor hydraulic output is sufficient, constant, and balanced with the rake's flow control settings. The hydraulic system requires a minimum of 14 GPM and should be free from surges.
Adhering to the safety guidelines and operational procedures outlined in this manual is essential for the safe and efficient use of the 8803 Rake. Regular maintenance and proper training are critical to prevent accidents and ensure the longevity of the equipment.
The document emphasizes the importance of understanding the flow control components of the rake hydraulic system. Modern tractors often have built-in hydraulic monitoring systems, eliminating the need for a pressure gauge, although it can be provided upon request. The side-lever adjusts the flow to the motors, with reference numbers for setup consistency. The document advises consulting the tractor manufacturer to determine the type of hydraulic system (open/closed center) and discusses the ball valve settings in detail in a later section.
The Allen Rake requires a minimum of 14 gallons per minute at operational pressure for optimal performance. The document warns against exceeding 90 RPM for the rake basket to prevent damage. It discusses achieving constant hydraulic flow, noting that perfectly constant flow is impossible but can be minimized through proper settings. The document provides guidance on setting flow controls for tractors with basic open-center or closed-center systems and those with built-in flow controls, emphasizing the importance of balanced flow to prevent overheating and maintain consistent basket rotation.
The pressure relief valve on the spool valve is crucial for maintaining back-pressure in the hydraulic circuit when a control lever is actuated. The document explains the relationship between cylinder force and basket rotation speed, advising on optimal pressure settings to ensure sufficient cylinder force while maintaining some basket rotation during control lever actuation. It also suggests using dry lubrication on telescoping cylinders to reduce hydraulic pressure requirements.
The document outlines the necessary supplies and equipment for adjusting the rake hydraulic system, emphasizing the importance of understanding the tractor's hydraulic system to avoid incompatible setups. It provides a checklist for determining the type of hydraulic system and other features of the tractor, such as flow controls and recommended accessories. Safety precautions are highlighted, including not exceeding specified pressures and ensuring personnel safety during operation.
- High-pressure fluids can cause serious injury if they penetrate the skin. Always shut off the tractor before connecting or disconnecting hydraulic lines and relieve pressure before unhooking lines.
- Ensure all connections are tight before applying pressure and use a piece of cardboard to detect leaks.
- If fluid is injected into the skin, seek immediate medical attention from a doctor familiar with such injuries.
- Before servicing, inspecting, or adjusting any mechanism, lower the unit to the ground, shut off the tractor, lock the parking brake, and remove the key.
- Ensure no personnel are in harm's way if machinery accidentally moves.
- Avoid wearing loose clothing that could get tangled in machinery.
- Stripper Bar Alignment: Ensure a minimum of ½” clearance between stripper bar ribs and tines. Use a hickey or pipe wrench for alignment.
- Hydraulic Orbital Motor Removal: Support the basket, remove motor mounting bolts and shaft bolt, and press the motor shaft out of the hub. Reverse the process for installation.
- Lift Cylinder Removal: Support the basket frame, lower the basket, remove hydraulic hose and cylinder pins, and reverse the process for installation.
- Tine and Tine Bar Replacement: Replace tines individually, ensuring they match the sequence and pattern of existing tines. Tighten mounting bolts to 20 ft. lb. of torque.
- Bearing Replacement: Remove and replace bearings as needed, ensuring all components are securely tightened.
- Swing Arm Bushing Replacement: Remove necessary components, replace bushings, and reverse the process for installation.
- Spindle Replacement: Remove hub, bearings, and spindle bolt, replace spindle, and reassemble components.
- Electronic Control Box: Check the fuse and battery source if the control box is non-functional. Investigate individual electric switches if only one function is non-operable.
- Regularly check and straighten tines to prevent contact with stripper bars.
- Perform maintenance on one side at a time when replacing poly slide bearings and shims.
- Ensure all safety messages are read and understood before attempting any procedures.
- Common Issues and Solutions:
- Tine Bar Breaking: Caused by basket running too fast. Solution: Reduce basket speed to not exceed 90 RPM.
- Front Basket Idler Spindle Breaking: Caused by basket height set too low or basket running too fast. Solution: Adjust basket height so tines are within 1/2” of the ground without touching it, and reduce basket speed.
- Disc Wheels Idler Spindle Breaking: Caused by loose tine bar head bolts, defective tine bar head bearing, or excessive basket speed. Solution: Tighten bolts, replace bearing, and reduce speed.
- Baskets Fail to Operate: Check valve position, replace hub, clean or replace flow control valve.
- Baskets Rise During Operation: Caused by excessive system back pressure. Solution: Refer to the hydraulics section of the owner's manual.
- Rake Function Fails: Caused by manual control cable issues, solenoid problems, or hydraulic motor/cylinder bypassing oil. Solution: Adjust cable, replace wire or solenoid, and install new seal kit.
- Main Frame: Includes weldments, cylinders, pins, and hydraulic tubes.
- Top Hose Rack: Comprises weldments, bearings, screws, washers, nuts, and hydraulic tube assemblies.
- Extension Arm: Contains weldments, bushings, pins, bolts, nuts, and clamps for both right and left-hand arms.
- Basket Adaptor, Pivot Arm, and Swing Arm: Includes pins, bolts, nuts, bushings, and cylinders.
- Basket Drive and Idler Ends: Features weldments, assemblies, bearings, bushings, bolts, nuts, and washers.
- Guard and Stripper Bar Detail: Consists of guards, bars, U-bolts, and nuts.
- Cylinders: Details on extension, lift, and swing cylinders with corresponding seal kits.
- Regularly replace the hydraulic filter to prevent malfunctions.
- Ensure the rake is hitched to the tractor for a proper ground connection.
Catalog excerpts

ALLEN® 8803 UNITIZED TWIN HAY RAKE OWNER-OPERATOR/PARTS MANUAL February 2016 Allen Farm Equipment PO Box 21049 Carson City NV. 89721
Open the catalog to page 1
Call: (775) 246-4555 MAILING ADDRESS: PO BOX 21049 CARSON CITY, NV. 89721 SHIPPING ADDRESS: 13 HEPPNER DRIVE, #1 MOUND HOUSE, NV. 89706 MACHINE IMPROVEMENTS The Manufacturer reserves the right to make changes and improvements in the product at any time without notice. The Manufacturer shall not be obligated to incorporate such changes and improvements in products previously sold to any customer, nor shall the Manufacturer be obligated to replace previously sold products with customers incorporating such changes and improvements.
Open the catalog to page 3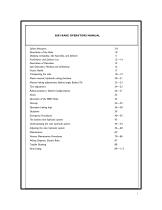
8803 RAKE OPERATORS MANUAL Shipping, Unloading, Site Assembly, and Delivery 11 Pre-Delivery and Delivery List 12—14 lack Operation, Hitching and Unhitching 16 Motor reversal, Hydraulic raking functions 20—21 Manual raking adjustments: Basket angle, Basket Tilt 22—23 Raking positions (Basket Configurations) 26—31 The basket rake hydraulic system 43 Understanding the rake hydraulic system 44—54 Adjusting the rake hydraulic system 56—68 Various Maintenance Procedures 70—86 Wiring Diagram, Electric Rake 87
Open the catalog to page 5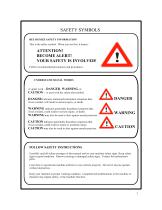
RECOGNIZE SAFETY INFORMATION This is the safety symbol. When you see this, it means: ATTENTION! BECOME ALERT! YOUR SAFETY IS INVOLVED! Follow recommended precautions and procedures: UNDERSTAND SIGNAL WORDS A signal word —DANGER, WARNING, or CAUTION — is used with the safety-alert symbol. DANGER ndicates imminently hazardous situations that, if not avoided, will result in serious injury, or death. WARNING ndicates potentially hazardous situations that, if not avoided, could result in serious injury, or death. WARNING may also be used to alert against unsafe practices. CAUTION indicates potentially...
Open the catalog to page 6
SAFETY PRECAUTIONS ACCIDENTS CAN BE PREVENTED Without the complete cooperation of the implement operator, no accident prevention program can be successful. The operator anticipating the results before an accident occurs and taking action to remedy the situation can prevent many accidents. No power driven equipment, whether it be for transportation or processing, whether it is used on the highway, in the field, or in the shop, can be safer than the person at the controls. If accidents are to be prevented, the operators who accept these responsibilities seriously will accomplish it. Elimination...
Open the catalog to page 7
SAFETY PRECAUTIONS 1. Never connect hydraulic lines or operate any portion of the machine unless machine is hitched to tow vehicle or tractor. 2. Do not operate hydraulic systems when hydraulic leaks are present. 3. Never ride the machine during transport or movement. 4. Always observe local traffic laws when transporting unit on public roads. 5. Always operate machine in a careful, controlled manner. 6. Personnel operating and working with this machinery and in any related duties must be properly trained and free of conditions or substances that may impair safety or good judgment. 7. Personnel...
Open the catalog to page 8
SAFETY PRECAUTIONS 20. Stand clear of tongue, framework and tow vehicle or tractor when operating jack or working with hitch. Look around to be sure that if something slipped or accidentally moved that no harm would occur. 21. Always lock brakes on tractor or towing vehicle, place in parking gear, and shut off tractor or towing vehicle before working with rake jack or unhitching rake. 22. Do not attempt to use torch or welding arc around the machine when in the crop, in the field, or around other flammable items. 23. Always wear proper safety attire for each usage condition or service procedure....
Open the catalog to page 9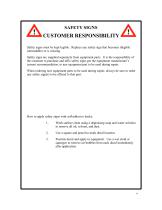
SAFETY SIGNS CUSTOMER RESPONSIBILITY Safety signs must be kept legible. Replace any safety sign that becomes illegible (unreadable) or is missing. Safety signs are supplied separately from equipment parts. It is the responsibility of the customer to purchase and affix safety signs per the equipment manufacture’s current recommendation, to any equipment part to be used during repair. When ordering new equipment parts to be used during repair, always be sure to order any safety sign(s) to be affixed to that part. How to apply safety signs with self-adhesive backs: 1. Wash surface clean using a...
Open the catalog to page 10
DECALS and SAFETY SIGNS DANGERWATCH YOUR FINGERS & HANDS Location: Front of rake basket 1 n.Kfid fi;i enter's Manual belnie using maihlre. ?. Slug tractor an pita. lowrr machine la It's cround. plana al unlink lr iieutnl, set park drain?. remgue Igr Itlns key and v£lr In1 all muuUiy parls to slop Jelan necking, idjusHnJ, repairing unplugging or Tiling 3 nsia N an-J aacm all ijnartfi ba'un starting 4. Cnp han.li, le-el Hair anc clottnng away Irani it nulng parts. $. So not allow rldgrt. G (top all hydtaiiljc linns. tltUnys 5 nd coup Ie.'s 1 in m and Ira e n1 le aka 3 ell't using i traar rniHctort,...
Open the catalog to page 11
DECALS and SAFETY SIGNS KEEP LUGS TIGHT GREASE DAILY Location: Facing outward on the framework above each wheel Location: F acing outward on the framework above each wheel Location: Facing outward on the framework above each wheel Location: Outwardly facing, on each side of the main frame, behind the main frame members that “V” outwards from the tongue.
Open the catalog to page 12
The 8803 Rake is a hydraulically driven rake used in many heavy and custom applications. The unitized frame is extended outward to each side for raking hay and retracted for transport to and from the field. Hydraulic motors, allowing constant basket speed even if the tractor ground speed changes, drive the left-hand delivery and right-hand delivery baskets. Controls for the rake can be either manually operated levers or an electric control panel. The operator keeps the rake control console handy for easy access while in the tractor seat. The following V-SETUP REFERENCE applies to the standard...
Open the catalog to page 13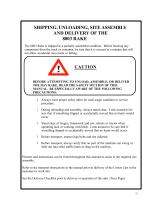
SHIPPING, UNLOADING, SITE ASSEMBLY AND DELIVERY OF THE 8803 RAKE The 8803 Rake is shipped in a partially assembled condition. Before hoisting any component from the truck or container, be sure that it is secured in a manner that will not allow accidental movement or falling. CAUTION BEFORE ATTEMPTING TO UNLOAD, ASSEMBLE, OR DELIVER THE HAY RAKE, READ THE SAFETY SECTION OF THIS MANUAL. BE ESPECIALLY AWARE OF THE FOLLOWING PRECAUTIONS: � Always wear proper safety attire for each usage condition or service procedure. During unloading and assembly, always stand clear. Look around to be sure that...
Open the catalog to page 14All Allen Farm Equipment catalogs and technical brochures
 MODEL 8794
52 Pages
 MODEL 8200
49 Pages
 MODEL 6300
51 Pages
 MODEL 8603
45 Pages