- Catalogs
- Alloway Standard Industries, Inc.
- Row Crop Cultivator
Row Crop Cultivator
1 /108Pages

Row Crop Cultivator
1 /108Pages
Catalog excerpts

TO THE DEALER: Assembly and proper installation of this product is the responsibility of the Alloway dealer. Read manual instructions and safety rules. Make sure all items on the Dealer’s Pre-Delivery and Delivery Check Lists in the Operator’s Manual are completed before releasing equipment to the owner. The dealer must complete the Warranty Registration included in this manual. Both dealer and customer must sign the registration which certifies that all Dealer Check List items have been completed. The dealer is to return the prepaid postage portion to Alloway, give one copy to the customer and...
Open the catalog to page 2
TABLE OF CONTENTS INTRODUCTION Inside Front Cover GENERAL INFORMATION 1 SAFETY RULES 3 - 7 CHECK LISTS (DEALER’S RESPONSIBILITY) 8 OPERATOR SIGN-OFF RECORD 9 SAFETY & INSTRUCTIONAL DECALS 10 - 13 OPERATION 15 - 30 OWNER SERVICE 31 - 35 TROUBLE SHOOTING
Open the catalog to page 3
Number of Rows: 8 - 12 Row Spacing: 20 - 30 in (51 - 76 cm) Transport Width (Folded): 14’ 4” (4.4 m) Overall Width (Operation): 25’ 6” (7.8 m) Transport Height (Folded): 13’ 4” (4.1 m) Size: (Traction Tire) 11.2 X 24 Tire Pressure: 20 PSI (137.9 kPa) Weight:
Open the catalog to page 4
OPTIONAL EQUIPMENT The Alloway Row Crop Cultivator has several toolbar types and a variety of optional equipment for row crop applications. Optional equipment may change these specifications. Cultivator weights do not include optional equipment. Guide and Support Wheels Adjustable guide wheel Semi-Pneumatic guide wheels Steel guide wheels King guide strut Flip-up 14” disc with knife mounts and knives Row Weeder Attachment Row weeder disc with clamp
Open the catalog to page 5
SAFETY RULES ATTENTION! BECOME ALERT! YOUR SAFETY IS INVOLVED! PREPARATION Safety is a primary concern in the design and manufacture of our products. Unfortunately, our efforts to provide safe equipment can be wiped out by a single careless act of an operator. Check that all hardware is tight and properly installed. Always tighten to torque chart specifications unless instructed otherwise in this manual. In addition to the design and configuration of equipment, hazard control and accident prevenion are dependent t upon the awareness, conern, prudence and proper c training of personnel involved...
Open the catalog to page 6
SAFETY RULES ATTENTION! BECOME ALERT! YOUR SAFETY IS INVOLVED! (Safety Rules continued from previous page) Remove accumulated debris from this equipment, tractor and engine to avoid fire hazard. Power unit must be equipped with ROPS or ROPS cab and seat belt. Keep seat belt securely fastened. Falling off power unit can result in death from being run over or crushed. Keep foldable ROPS systems in “locked up” position at all times. Ensure all safety decals are installed. Replace if damaged. (See Safety Decals section for location.) Ensure shields and guards are properly installed and in good condition....
Open the catalog to page 7
SAFETY RULES ATTENTION! BECOME ALERT! YOUR SAFETY IS INVOLVED! (Safety Rules continued from previous page) Operate tractor PTO at the RPM speed stated in "Specifications" section. OPERATION Equipment may be pictured with covers open for instructional purposes. Never operate equip ment with covers open. Look down and to the rear and ensure area is clear before operating in reverse. Do not allow bystanders in the area when oper ating, attaching, removing, assembling or servic ing equipment. Do not operate or transport on steep slopes. Do not stop, start or change directions sud enly on slopes....
Open the catalog to page 8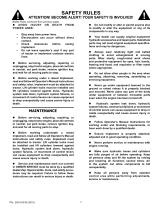
SAFETY RULES ATTENTION! BECOME ALERT! YOUR SAFETY IS INVOLVED! (Safety Rules continued from previous page) AVOID INJURY POWER LINES: • • • • Do not modify or alter or permit anyone else to modify or alter the equipment or any of its compo ents in any way. n Stay away from power lines. Electrocution can occur without direct contact. Check clearances before raising implement. Do not leave operator’s seat if any part of tractor or implement contacts electric lines. Your dealer can supply original equipment hydraulic accessories and repair parts. Substitute parts may not meet original equipment specifica...
Open the catalog to page 9
SAFETY RULES ATTENTION! BECOME ALERT! YOUR SAFETY IS INVOLVED! (Safety Rules continued from previous page) Make certain all movement of imple ent m components has stopped before approaching for service. Do not handle blades with bare hands. Careless or improper handling may result in serious injury. Tighten all bolts, nuts and screws to torque chart specifications. Check that all cotter pins are installed securely to ensure equipment is in a safe condition before operating. Ensure all safety decals are installed. Replace if damaged. (See Safety Decals section for location.) Ensure shields and...
Open the catalog to page 10
CHECK LISTS PRE-DELIVERY CHECK LIST DELIVERY CHECK LIST Inspect the equipment thoroughly after assembly to ensure it is set up properly before delivering it to the customer. ѩѩ Check that all safety decals are installed and in good condition. Replace if damaged. (DEALER’S RESPONSIBILITY) (DEALER’S RESPONSIBILITY) ѩѩ Show customer how to make adjustments and select proper PTO speed. The following check lists are a reminder of points to inspect. Check off each item as it is found satisfactory or after proper adjustment is made. ѩѩ Show customer how to make adjustments. ѩѩ Check that all safety...
Open the catalog to page 11
SAFETY & INSTRUCTIONAL DECALS ATTENTION! BECOME ALERT! YOUR SAFETY IS INVOLVED! Replace Immediately If Damaged! J. 200-3-4034 Orange Fluorescent Reflector 9 x 2 DANGER SHIELD MISSING K. 506-3-0194 Shield Missing Warning D. 500-3-0980 Missing Shields Warning
Open the catalog to page 13
SAFETY & INSTRUCTIONAL DECALS ATTENTION! BECOME ALERT! YOUR SAFETY IS INVOLVED! Replace Immediately If Damaged! 7. 506-3-0195 Hydraulic Pressure Warning Three Point Warning 9. 200-3-3888 Raised Wing Hazard 10. 200-3-4028 Tipping Hazard Warning Decal 6. 200-3-4030 Cylinder Lock Warning
Open the catalog to page 16
BOLT TORQUE CHART SAE Series Torque Chart Always tighten hardware to these values unless a different torque value or tightening procedure is listed for a specific application. Fasteners must always be replaced with the same grade as specified in the manual parts list. Make sure fastener threads are clean and you properly start thread engagement. SAE Bolt Head Identification A Wrench Size Metric Series Torque Chart Use only metric tools on metric hardware. Always tighten hardware to these values unless a different torque value or tightening procedure is listed for a specific application. Fasteners...
Open the catalog to page 103All Alloway Standard Industries, Inc. catalogs and technical brochures
 RIGID BEET HARVESTER 2020 HV8R22
105 Pages
 BEET DEFOLIATOR 2013-2014
118 Pages
 FOLDING DEFOLIATOR 2013-2014
92 Pages
 2012 SEEDBETTER
62 Pages
 2012-Folding Defoliator
88 Pages
 2011-FoldingDefoliator
88 Pages
 2008- Folding Defoliator
64 Pages
 2009-2010 Folding Defoliator
75 Pages
 2010 Seedbetter
62 Pages

- Lifter
- Vibro-cultivator
- Mounted vibro-cultivator
- Vertical tiller
- Vibro-cultivator with roller
- Vegetable harvesting machine
- Rigid tine vibro-cultivator
- Folding vibro-cultivator
- Mounted disc tiller
- Mounted mechanical weeder
- Towed harvesting machine
- Weeding row hoe
- 2-row harvesting machine
- Foldable disc harrow
- Folding mechanical weeder
- Fixed row hoe
- Beet harvesting machine
- 1-section disc harrow
- Haulm topper