
- Catalogs
- ANIMAT Inc.
- animattress I


- Products
- Catalogs
- News & Trends
- Exhibitions
animattress I

animattress I
- Step 1: Strike a line on the alley curb approximately 3” from the curb face. The mattress should be about 1” away from the curb face when installed.
- Step 2: Lay out the top cover in the alley with the orange side up, ensuring the correct side is next to the curb. Leave 6”-12” of top cover at each end for stretching.
- Step 3: Install the Matstrip flush with the cover edge, starting with the first anchor 8” from the run end, followed by anchors at 6” and 12”.
- Step 4: Pull the cover tight along the curb, drilling and installing split drive anchors every 8”-12”. Drill holes at least 3.5” deep.
- Step 5: Lay foam pads over the plastic film, trimming as necessary to leave a 5” gap for anchoring.
- Step 6: Roll out the plastic film over the stall and top cover, wrapping the foam pads tightly.
- Step 7: Fold the top cover over the foam pad, pulling tight to eliminate wrinkles. Use spacers to maintain foam position.
- Step 8: Anchor the top cover and plastic film with BEV212 and split-drive anchors, ensuring no wrinkles remain.
- Step 9: For top cover joints, overlap covers by 4-5” and fix with Matstrip and split drive. Ensure a 3” gap between foams at overlaps, installing a round plastic strip in the gap.
Catalog excerpts
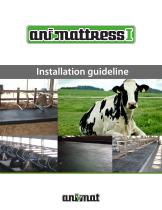
Installation guideline
Open the catalog to page 1
Prerequisites The concrete surface that will be the installation site and the alley in front of the stall bed surface must be clean. That concrete should be at least 3500 psi small aggregate for those curbs and stall beds. Also, when installing in a new barn, the concrete should cure at least 30 days before drilling and pinning anything. Otherwise, the pins just push through the sidewalls of the drilled holes and don’t compress which reduces their anchoring ability. What you’ll need to install the Animattress I • • • • • • Roll of rubber Top Cover 164’ (50 m) PU Foam Protective plastic film...
Open the catalog to page 2
Strike a line on the top of the alley curb that is approximately 3” (7,62cm) in from the curb face at the closest point of the run. Use a long line since most curbs are NOT straight. When the installation is complete, the mattress should be about 1”(2,54cm) away from the curb face. Concrete (stall) Alley Line Lay out the top cover in the clean alley (orange side up) and position the edge that has the backing closest to the edge of the cover so that it touches the struck line. Check before unrolling the cover to make sure you have the correct side of the roll next to the curb. THEY ARE DIFFERENT....
Open the catalog to page 3
Install the plastic strip (Matstrip) flush with the edge of the cover, starting at one end of the cover with the first anchor being placed about 8”(20,32cm) away from the end of the run. Then install two more anchors about 6”(15,24cm) and 12”(30,48cm) from the first anchor after pulling all the slack out of the unrolled cover. Concrete (stall) Top cover Matstrip (white plastic strip) Go to the far end of the unrolled cover and pull it tight along the top of the curb. Drill and install a split drive (112) anchor every 8” – 12” (20,32cm - 30,48cm) in the plastic strips (Matstrip) as you move on...
Open the catalog to page 4
After the top cover has been positioned and installed on top of the curb, roll out the plastic film in the stall and on the top cover over the alley. Plastic film Top cover Lay out the foam pads over the plastic film, place the pads tightly against each other as you work down the stall platform. You might need to trim a foam pad at the ends of a row in order to leave a gap of about 5”(12,70cm) to allow for anchoring. Foam Plastic film Top cover
Open the catalog to page 5
Wrap up the pads with the plastic film, every side need to be closed. Place the foam pads so that the tapered “notched” end is resting on top of the plastic strip(Matstrip) and the notch is “butted” snugly against the strip, or slightly past the strip towards the curb face. Plastic film joint The top cover is folded back up over the foam pad towards the “head end” of the stall and pulled very tight to eliminate wrinkles, starting in the middle of the run. You may need to put a spacer in front of each foam when pulling the cover tight to keep the foam from being displaced from the correct “notch”...
Open the catalog to page 6
The top cover and the plastic film are anchored with the plastic strip (BEV212) and the splitdrive anchors(212), spaced at 8” – 12” (20,32cm - 30,48cm) intervals along the length of the run and at both ends as well. Work your way first one way and then the other from center until the entire section is anchored and there are no wrinkles. If you don’t get the cover pulled tight before anchoring to the curb, or don’t get the center of the run tight, you WILL have wrinkles. How to make a top cover joint Step 1 : Overlap the two top cover by about 4-5’’(10,16cm - 12,70cm) with the matstrip close to...
Open the catalog to page 7
Animat 819-821-2091 395 rodolphe-Racine Sherbrooke Qc, Canada
Open the catalog to page 8All ANIMAT Inc. catalogs and technical brochures
 Interlock
1 Page
 Animat original
1 Page
 Animattress III
1 Page
 Transition
1 Page
 Equine
1 Page
 Maxgrip
1 Page
 Beef solution
4 Pages
 dairy solution
8 Pages
 Equine solution
2 Pages
- Non-slip flooring
- Rubber flooring
- Rubber floor mat
- Non-slip floor mat
- Free-stall bed
- Floor mat for farm buildings
- Cubicle free-stall bed
- Cow breeding floor mat
- Rubber free-stall bed
- Horse breeding floor mat
- Foam cow mattress
- Grooved flooring
- Cow comfort cow mattress
- Grooved floor mat
- Anti-slip cow mattress
- Cow hygiene cow mattress
- Dairy barn cow mattress