
- Catalogs
- horizont group gmbh - Division agrartechnik
- Electric Fencer

Electric Fencer

Electric Fencer
- 9 Volt Dry Battery: Use alkaline batteries and ensure correct polarity.
- 12 Volt Rechargeable Battery: Use rechargeable lead batteries, charge in ventilated areas, and avoid complete discharge.
- Positioning: Face south for maximum sunlight, especially in winter. Avoid shaded areas.
- Inclination Angle: Adjust according to the season for optimal recharge. Steeper angles help with cleaning during rain or snow.
- Maintenance: Clean the solar panel regularly to maintain performance.
- 9V Battery: Use alkaline batteries. Indicators: green (15-100%), red/green (5-15%), red (0-5%).
- 12V Battery: Use rechargeable lead-acid batteries. Charge in ventilated areas and avoid deep discharge. Indicators: green (40-100%), red/green (20-40%), red (0-20%).
- 230V Adapter: Use specified adapter for mains operation. Disconnect 9V battery when using the adapter.
- Solar Panel: Includes a solar charge regulator. Ensure correct polarity. Avoid leaving the device off in the sun with a connected battery or solar panel.
Catalog excerpts

ORIGINALBETRIEBSANLEITUNG Elektrozaungerat INSTRUCTION MANUAL Electric Fencer NOTICE D‘UTILISATION Electrificateur de cloture INSTRUCCIONES DE SERVICIO Valla electrica MANUAL DE INSTRUQOES Cerca Electrica ISTRUZIONI PER L’USO Apparecchio per recinti elettrici NAVOD NA OBSLUHU pre napajacie zariadenie elektrickej ohradyohrady brugsanvisning El-hegnsapparat BEDIENINGSHANDLEIDING Schrikdraadinstallatie horizont horizont group gmbh Animal Care Postfach 15 69 34483 Korbach Homberger Weg 4-6 34497 Korbach Germany
Open the catalog to page 1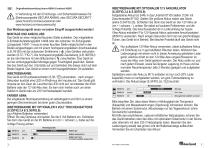
DE Originalbetriebsanleitung farmer ABN4 & hotshock ABN5 in Verbindung mit den Errichtungs- und Sicherheitshinweisen fur Elektrozaungerate SECURA ANIMAL oder SECURA SECURITY (www.horizont.com/securaanimal oder www.horizont.com/securasecurity) Das Weidezaungerat muss vor jedem Eingriff ausgeschaltet werden! MONTAGE UND ANSCHLUSS: Das Gerat an einer moglichst feuchten Stelle aufstellen. Der mitgelieferte U-Erdstab/Aufstellungspfahl 14498 oder der optionale 1m-Erdungsstab (Langsstab) 14041-1 muss an einer feuchten Stelle moglichst tief in den Boden eingeschlagen und mit einem hochspannungsfestem...
Open the catalog to page 2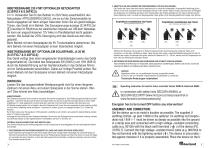
INBETRIEBNAHME 230 V MIT OPTIONALEN NETZADAPTER (S.35/FIG.4 & S.36/FIG.5): Verwenden Sie für den Betrieb im 230V Netz ausschließlich den Netzadapter 47PSU0008FEU/UK/US, wie es auf der Zwischenplatte im Gerät angegeben ist! Nach einigen Sekunden hören Sie ein gleichmäßiges Ticken, das Gerät ist in Betrieb. Die Zaunspannungs-anzeige (S.34/FIG.2a/ 1 ) leuchtet im Rhythmus der elektrischen Impulse auf. Mit dem Netzadapter kann ein angeschlossener 12V Akku im Parallelbetrieb leicht geladen werden. Bei Ausfall der 230V-Versorgung wird das Gerät aus dem Akku gespeist. Beim Betrieb mit dem Netzadapter...
Open the catalog to page 3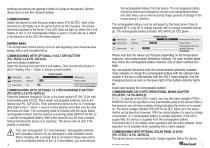
earthing rod and do not operate it while it is lying on the ground. Set the device up in a non fire-hazard location. COMMISSIONING: Switch the device on with the push-button switch (PG.38/ 0) - after a few seconds an LED lights up in the same rhythm as the impulses. The device transmits impulses to the fence. If the LED does not light up, either the 9 volt battery or the 12 volt rechargeable battery is spent. It could also be a defect in the device or at the 230 volt mains adapter. FARMER ABN4: The incorporated current saving circuit is self-regulating and consumes less energy with a well insulated...
Open the catalog to page 4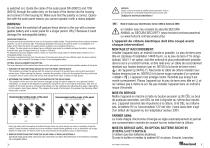
is switched on). Guide the cable of the solar panel 5W (60812) and 10W (60812) through the cable entry on the back of the device into the housing and connect in the housing lid. Make sure that the polarity is correct. Operation with the solar panel means you cannot operate it with a mains adapter. WARNING: Do not leave the switched off pasture fence device in the sun with a rechargeable battery and a solar panel for a longer period. Why? Because it could damage the rechargeable battery. OPERATING PRINCIPLE: The solar panel produces electricity as soon as it is exposed to usable sunlight. The...
Open the catalog to page 5
I’appareil sur la batterie 9V (rouge + / noir -) en veillant a la bonne polarite. Accu entierement vide : a recharger immediatement MISE EN SERVICE AVEC, EN OPTION, ACCUMULATEUR 12V (P.35/FIG.3,4 ET P.36/FIG.6) Placez les accumulateurs recharges jusqu’a 34Ah dans la partie inferieure 87100 (12Ah avec plaque intermediate 87102). Placez les accumulateurs plus grands a cote de l’appareil (voir P.34/FIG.2b). Branchez ensuite l’appareil sur l’accumulateur 12V (rouge +/ noir -) en veillant a la proprete des bornes des poles ainsi qu’a la bonne polarite. Le cable de raccordement est fourni avec les...
Open the catalog to page 6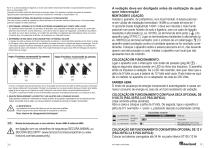
Par 0 °C ou des températures négatives, il est de toute manière recommandé d’utiliser une grande batterie alcaline 9V au lieu d’un accumulateur 12V. L’appareil est toutefois avant tout alimenté par le panneau solaire. Si le panneau ne génère pas assez de puissance, l’appareil puisera automatiquement le courant sur la batterie 9V connectée ou l’accumulateur 12V. POSITIONNEMENT OPTIMAL PAR RAPPORT AU SOLEIL ET CONFIGURATION Une mise en place correcte de l’appareil de clôture électrique et du panneau solaire est décisive pour un fonctionnement parfait de l’appareil de clôture électrique. 1. POSITIONNEZ...
Open the catalog to page 7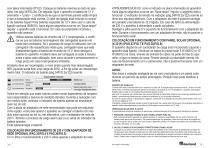
com placa intermédia 87102). Coloque as baterias maiores ao lado do aparelho (ver pág.34/FIG.2b). De seguida, ligue o aparelho à bateria de 12 V (vermelho + / preto - ), certificando-se que os terminais polares estão limpos e que a polarização está correta. O cabo de ligação está incluído no conjunto de baterias Super! Para baterias especiais de 12 V deve usar o cabo de ligação opcional (905010). Após alguns segundos ouve-se um "tique-taque" regular: o aparelho está a funcionar. Em caso de polaridade incorreta o aparelho não arranca. Utilizar apenas baterias de chumbo de 12 V recarregáveis, e...
Open the catalog to page 8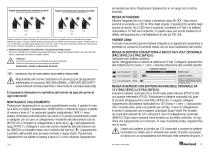
Durante o periodo do inverno (exceto no Sul da Europa) as horas do sol poderiam nao ser suficientes para carregar totalmente a bateria. Carregue a bateria externamente assim que o indicador da pilha comegar a piscar a verde/vermelho ou use, em alternativa, uma pilha grande alcalina de 9 V com 170 - 200 Ah, que sao recomendadas mesmo com temperaturas que rondam o ponto de congelagao ou que ficam mesmo abaixo dele. 3. REMOVA REGULARMENTE OS DEPOSITOS E A SUJIDADE DO PAINEL SOLAR Isso inclui a remogao de erva cortada, poeira (especialmente em estradas de cascalho), folhas e neve, pois isso pode reduzir...
Open the catalog to page 9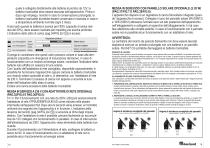
quale è collegato direttamente alla batteria al piombo da 12V, la batteria ricaricabile deve essere staccata dall’apparecchio. Prima e dopo ogni impiego, nonché in caso di conservazione prolungata, la batteria ricaricabile dovrebbe essere conservata e ricaricata in casa e a temperatura ambiente normale (ogni 2 mesi). Al più tardi quando la batteria è scarica per l’80% (capacità di carica residua del 20%), deve essere ricaricata per impedire una scarica profonda. L’indicatore dello stato di carica (pag.34/FIG.2a/ 1 ) è acceso: capacità residua Luce lampeggiante Verde Rosso/ Luce lampeggiante Verde...
Open the catalog to page 10All Horizont group gmbh - Division agrartechnik catalogs and technical brochures
 ELECTRIC FENCING CATALOGUE
192 Pages
 EQUISTOP M
7 Pages
 EQUISTOP M1
5 Pages
 horiSMART
9 Pages
 Electric fencing range
156 Pages
 Clippers for cattle
2 Pages
 Wolf defence
2 Pages
 Happy
Happy2 Pages

- Plastic netting
- Drinking system
- Protective netting
- Feeder
- Metal waterer
- Plastic drinking system
- Cattle waterer
- Lick block
- Ear tag
- Bowl drinking system
- Lick block with trace elements
- Multi-access feeder
- Fence energizer
- Plastic feeder
- Cattle lick block
- Battery-powered fence energizer
- Horse waterer
- Goat lick block
- Plug-in fence energizer
- Portable fence energizer