


- Company
- Products
- Catalogs
- News & Trends
- Exhibitions
Brochures half pruning ELECTROCOUP F3020

Brochures half pruning ELECTROCOUP F3020
Catalog excerpts

Pruning shears OTHER LANGUAGES
Open the catalog to page 1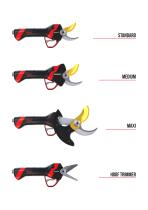
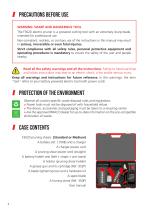
I Precautions before use WARNING: SHARP AND DANGEROUS TOOL The F3020 electric pruner is a powered cutting tool with an extremely sharp blade, intended for professional use. Non-compliant, reckless, or contrary use of the instructions in this manual may result in serious, irreversible or even fatal injuries. Strict compliance with all safety rules, personal protective equipment and operating procedures is mandatory to ensure the safety of the user and people nearby. Read all the safety warnings and all the instructions. Failing to heed warnings and follow instructions may lead to an electric shock,...
Open the catalog to page 4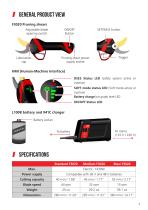
Adjustable blade opening switch Pruning shear power supply socket HMI (Human-Machine Interface) DSES Status LED (safety system active or inactive) SOFT mode status LED (Soft mode active or inactive) Battery charge bar graph level LED
Open the catalog to page 5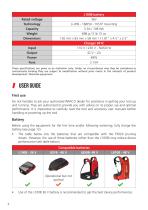
These specifications are given as an indication only. Under no circumstances may they be considered as contractually binding.They are subject to modification without prior notice in the interests of product development. Patented equipment. I USER GUIDEFirst use Do not hesitate to ask your authorized INFACO dealer for assistance in getting your tool up and running. They are authorized to provide you with advice on its proper use and optimal performance. It is imperative to carefully read the tool and accessory user manuals before handling or powering up the tool. Before using the equipment for...
Open the catalog to page 6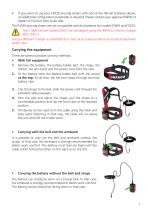
If you want to use your F3020 pruning shears with one of the 48 volt batteries above, an additional configuration parameter is required. Please contact your approved INFACO dealer to find out how to do that. The F3020 pruning shears are not compatible with the batteries for models F3005 and F3010. The L100B Lithium battery MUST be recharged using the INFACO Lithium charger (Ref.: 941C). Using a different charger is prohibited as it may cause a serious electrical accident (explosion and/or fire).. Carrying the equipment There are several possible carrying methods: • With full equipment Remove...
Open the catalog to page 7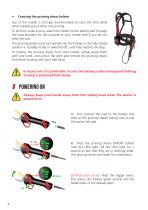
Carrying the pruning shear holster Use of the holster is strongly recommended to carry the tool safely when travelling and when not pruning. To do that, make sure to attach the holster to the battery belt through the loop provided for this purpose or your trouser belt if you do not wear the vest. The pruning shears must be inserted into the holster in the fully closed position in standby mode or switched off, until they reaches the stop. To remove the pruning shears from their holster, simply grasp them with one hand, and unlock the latch and remove the pruning shears from their housing with...
Open the catalog to page 8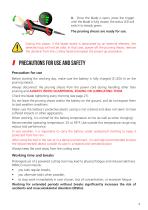
4. Once the blade is open, press the trigger until the blade is fully closed, the status LED will switch to steady green. The pruning shears are ready for use. During this phase, if the blade stroke is obstructed by an external element, the detected stop will not be valid. In that case, power off the pruning shears, remove the obstacle from the cutting head and repeat the power-up procedure. I Precautions for use and safety Precaution for use Before starting the working day, make sure the battery is fully charged (3 LEDs lit on the pruning shears). Always disconnect the pruning shears from the...
Open the catalog to page 9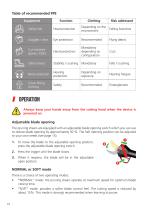
Always keep your hands away from the cutting head when the device is powered on. Adjustable blade opening The pruning shears are equipped with an adjustable blade opening switch which you can use to reduce blade opening by approximately 50 %. The half opening position can be adjusted to your own needs (see page 15). 1. To move the blade to the adjustable opening position, press the adjustable blade opening switch. 2. Press the trigger until the blade closes. 3. When it reopens, the blade will be in the adjustable open position. NORMAL or SOFT mode There is a choice of two operating modes: • "NORMAL"...
Open the catalog to page 10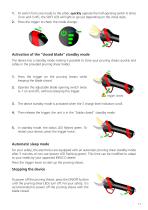
To switch from one mode to the other, quickly operate the half-opening switch 6 times (3 on and 3 off), the SOFT LED will light or go out depending on the initial state. Press the trigger to check the mode change. 3x Activation of the "closed blade" standby mode The device has a standby mode making it possible to store your pruning shears quickly and safely in the provided pruning shear holder. 2x Press the trigger on the pruning shears while keeping the blade closed. Operate the adjustable blade opening switch twice (= 1 on and off), without releasing the trigger. trigger closed The device standby...
Open the catalog to page 11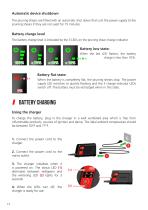
Automatic device shutdown The pruning shears are fitted with an automatic shut down that cuts the power supply to the pruning shears if they are not used for 15 minutes. Battery charge level The battery charge level is indicated by the 3 LEDs on the pruning shear charge indicator. Battery low state: When the last LED flashes, the battery charge is less than 10%. Battery flat state: When the battery is completely flat, the pruning shears stop. The power supply LED switches to quickly flashing and the 3 charge indicator LEDs switch off. The battery must be recharged when in this state. I Battery...
Open the catalog to page 12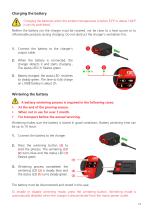
Charging the batteries when the ambient temperature is below 32°F or above 104°F is strictly prohibited. Neither the battery nor the charger must be covered, nor be close to a heat source or to inflammable products during charging. Do not obstruct the charger's ventilation fins. 1. Connect the battery to the charger's output cable. 2. When the battery is connected, the charger detects it and starts charging., The status LED (1) flashes green. 3. Battery charged: the status LED switches to steady green. The time to fully charge an L100B battery is about 2h. A battery wintering process is required...
Open the catalog to page 13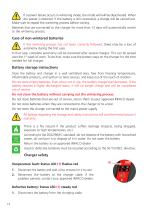
If a power failure occurs in wintering mode, the mode will will be deactivated. When the power is restored, if the battery is still connected, a charge will be carried out. Make sure to repeat the wintering process before storing. Batteries that are connected to the charger for more than 13 days will automatically switch to the wintering process. Case of non-wintered batteries If the wintering process has not been correctly followed, there may be a loss of autonomy during the first uses. In that case, complete autonomy will be recovered after several charges. This can be spread over the 1st week...
Open the catalog to page 14All INFACO catalogs and technical brochures
 electro'liv 12v
24 Pages
 V5000
24 Pages
 tying machine At1000/36
36 Pages
 Manual tying machine AT1000
36 Pages
 Brochures tying machine AT1000
24 Pages
 ELECTROCOUP F3020 User guide
36 Pages
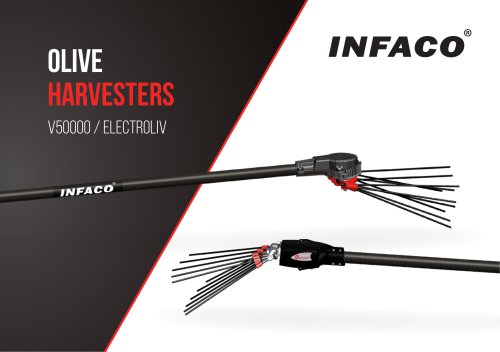 olive harvesters
24 Pages
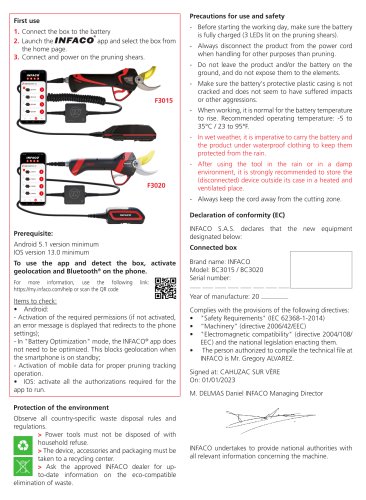
Archived catalogs
 kit medium
2 Pages
 Brochures POWERCOUP PW3
28 Pages
 Brochures hoof kit F3020
16 Pages
- Olive rake
- Vineyard pruning shears
- Electric pruning shears
- Electric olive rake
- Lightweight pruning shears
- Left-handed pruning shears
- Precision pruning shears
- Connected control system
- Tying tool
- Harvesting pruning shears
- Battery-powered pruning shears
- Telescopic pruning shears
- Bypass blade pruning shears
- Pruning shears with position lock
- Compact pruning shears
- Long-reach pruning shears
- Electric vine binder
- Viticulture vine binder