


- Company
- Products
- Catalogs
- News & Trends
- Exhibitions
kit medium
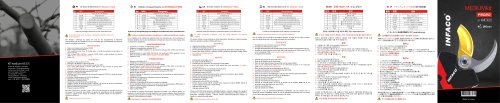
kit medium
Components List:
The kit includes a Medium Kit cutting head, removable covers, various screws (M3x10, plastic countersunk screws 3x16 and 3x10), a TORX 30 wrench, and an extension.
General Instructions:
An assembly video is available at www.infaco.com. Ensure the pruning shears are disconnected before starting any operation. It is recommended to seek assistance from an authorized dealer for changing the cutting head.
Disassembly Steps:
1. Remove the two cover screws (V3020).
2. Take off the removable cover (921C).
3. Use a flat-tipped screwdriver to remove the cover protecting the hook screws (921CV).
4. Remove the two hook screws (906V) using the TORX wrench (CLET30) and the extension (750R). Tighten the vise moderately.
5. Remove the Kit.
Assembly Steps:
1. Screw in the two screws (V310).
2. Place the Medium Kit on the pruning shears.
3. Screw in the two hook screws (906V) without tightening.
4. Using the TORX wrench (CLET30) and the extension (750R), tighten the two hook screws (906V). Tighten the vise moderately.
5. Place the hook screw protection cover (921CV).
6. Place the removable cover support (921CMS).
7. Screw in the screw (V310TF).
8. Grease the rack and pinion teeth using Extreme performance grease (952GA).
9. Place the Medium Kit removable cover (921CM).
10. Screw in the two screws (V316).
11. Loosen the screw (V56TB).
12. Unscrew the nut (810E) by a quarter turn.
13. Using the grease gun (952P), grease the kit through the greasing cap (809B) until grease appears between the blade and the nut (810E).
14. Re-tighten the nut (810E).
15. Lock the screw (V56TB).
Final Steps:
Refer to page 7 of the user manual for "Powering on" instructions. For adjustable blade opening or overlap, refer to page 16 of the user manual. Ensure all parts are carefully stored.
Overview:
This document provides detailed instructions for the disassembly and assembly of the Medium Kit F3020 for a pruning shear. It includes specifications for screws and tools required, as well as safety precautions and maintenance recommendations.
Specifications:
Components include a cutting head, removable cover, and various screws (M3x10, plastic countersunk screws 3x16 and 3x10). Tools required: TORX 30 key, extension, and a flathead screwdriver.
Safety Precautions:
Always disconnect the pruning shear from the battery before performing any operations. Consult a retailer for assistance when replacing the cutting head.
Additional Instructions:
Refer to page 7 of the user manual for device startup instructions. For blade opening or overlap adjustments, refer to page 16 of the user manual. Keep all parts carefully stored.
Resources:
A video of the assembly is available on the website: www.infaco.com.
Catalog excerpts
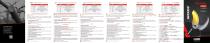
Κεφαλή κοπής του «Kit Medium» Αφαιρούμενο κάλυμμα Υποστήριγμα του αφαιρουμένου καλύμματος Parafuso M3x10 de cabeça fresada (x1) Parafuso plástico de cabeça fresada 3x16 (x2) Cabeça de corte “Kit Medium” Tampa amovível Suporte de tampa amovível Stříhací hlava „Kit Medium“ Snímatelný kryt Držák na snímatelný kryt Hulpstuk voor afneembare kap Βίδα πλαστική φρεζάτη 3 x 16 (x 2) Šroubek se zapuštěnou hlavou 3x10 (x1) Plastový šroubek se zapuštěnou hlavou 3x16 (2 kusy) Plastic schroeven met verzonken kop 3x16 (x2) Βίδα πλαστική φρεζάτη 3x10 (x2) Plastový šroubek se zapuštěnou hlavou 3x10 (2 kusy) Plastic schroeven met verzonken kop 3x10 (x2) gancho (921CV). D. Com a chave TORX (CLET30) e extensão (750R), retirar os dois parafusos do gancho (906V). Apertar moderadamente o torno. E. Retirar o Kit. Parafuso plástico de cabeça fresada 3x10 (x2) A. Retirar os dois parafusos da tampa (V3020). B. Retirar a tampa amovível (921C). C. Com a ajuda de uma chave de fendas, retirar a tampa de proteção dos parafusos do Para efetuar a alteração da cabeça de corte do seu equipamento, é altamente recomendado que peça assistência ao seu revendedor, que está habilitado para fornecer todos os conselhos necessários. Notice de montage / Assembly instructions / Montageanleitung / Instrucciones de montaje / Guida per il montaggio / Instruções de montagem / Οδηγίες συναρμολόγησης / Montážní návod / Montagehandleiding voor / 조립 설명서 / 取付説明書 Para realizar todas estas operações, é obrigatório desligar a tesoura de podar da bateria. Aparafusar os dois parafusos (V310). Posicionar o Kit Medium na tesoura de podar. Aparafusar, sem apertar, os dois parafusos do gancho (906V). Com a chave TORX (CKET30) e extensão (750R), apertar os dois parafusos do gancho (906V) Apertar moderadamente o torno. Posicionar a tampa de proteção dos parafusos do gancho (921CV). Posicionar o suporte da tampa amovível (921CMS). Aparafusar o parafuso (V310TF). Lubrificar com a Massa lubrificante de extremo desempenho (952GA) os dentes do pinhão e da cremalheira. Posicionar a tampa amovível (921CM) do Kit Medium. Aparafusar os dois parafusos (V316). Desbloquear o parafuso (V56TB). Desapertar a porca (810E) de um quarto de volta. Usando a bomba de lubrificação (952P), lubrificar o kit através da tampa de lubrificação (809B) até aparecer graxa entre a lâmina e a porca (810E). Apertar novamente a porca (810E). Bloquear o parafuso (V56TB). Para ativar a ferramenta, consultar a página 7 do manual de utilização do aparelho “Colocação sob tensão”. Se necessário, para efetuar os ajustes de meia-abertura ou de cruzamento, consultar a página 16 do manual de utilização do aparelho “Ajuste da meia-abertura / cruzamento de lâmina”. Equacionar guardar todas as peças. Το βίντεο της συναρμολόγησης είναι διαθέσιμο στο διαδικτυακό τόπο: www.infaco.com. Montážní video je k dispozici na internetové stránce: www.infaco.com Při každé následující manipulaci musí být nůžky odpojeny od síťového napájení! Για όλες τις διαδικασίες, βγάζετε οπωσδήποτε το κλαδευτικό ψαλίδι από το ρεύμα. Για να προβείτε στην αλλαγή της κεφαλής κοπής της συσκευής σας, σας συνιστούμε να ζητήσετε βοήθεια από τον εξουσιοδοτημένο αντιπρόσωπο σας ώστε να σάς παρέχει όλες τις απαραίτητες συμβουλές. ΑΠΟΣΥΝΑΡΜΟΛΟΓΗΣΗ: A. Αφαιρέστε τις δύο βίδες του καλύμματος (V3020). B. Αφαιρέστε το αφαιρούμενο κάλυμμα (921C). C. Με ένα ίσιο κατσαβίδι, αφαιρέστε το προστατευτικό κάλυμμα από τις βίδες του άγκιστρου (921CV). D. Χρησιμοποιώντας το κλειδί TORX (CLET30) και την προέκταση (750R), αφαιρέστε τις δύο βίδες του άγκιστρου (906V). Σφίξτε τη μέγγενη σε μέτριο βαθμό. Βιδώστε τις δύο βίδες (V310). Τοποθετήστε το Kit Medium στο κλαδευτικό ψαλίδι. Βιδώστε,χωρίς σφίξιμο, τις δύο βίδες του άγκιστρου (906V). Χρησιμοποιώντας το κλειδί TORX (CLET30) και την προέκταση (750R), σφίξτε τις δύο βίδες του άγκιστρου (906V). Σφίξτε τη μέγγενη σε μέτριο βαθμό. Τοποθετήστε το προστατευτικό κάλυμμα των βιδών του άγκιστρου (921CV). Τοποθετήστε το υποστήριγμα του αφαιρουμένου καλύμματος (921CMS). Βιδώστε τη βίδα (V310TF). Λιπάνετε τα δόντια του γραναζιού της κρεμαγιέρας και την κρεμαγιέρα με γράσο εξαιρετικών επιδόσεων (952GA). Τοποθετήστε το αφαιρούμενο κάλυμμα (921CM) του Κit Medium. Βιδώστε τις δύο βίδες (V316). Λασκάρετε τη βίδα (V56TB). Ξεβιδώστε το περικόχλιο (810E) κατά ένα τέταρτο της στροφής. Με τον γρασαδόρο (952P), λιπάνετε το κιτ μέσω της τάπας γρασαρίσματος (809B) μέχρι να εμφανιστεί γράσο ανάμεσα στη λεπίδα και το περικόχλιο (810E). Σφίξτε το περικόχλιο (810E). Σφίξτε τη βίδα (V56TB). Για να θέσετε τη συσκευή σε λειτουργία, ανατρέξτε στη σελίδα 7 των οδηγιών χρήσης του εργαλείου «Ρευματοδότηση». Εάν είναι απαραίτητο, για να γίνουν ρυθμίσεις, μισού-ανοίγματος ή διασταύρωσης, ανατρέξτε στην σελίδα 16 των οδηγιών χρήσης της συσκευής «Ρύθμιση μισούανοίγματος / διασταύρωση της λεπίδας». Μην ξεχάσετε να φυλάξετε όλα τα εξαρτήματα. Při výměně stříhací hlavice přístroje je vřele doporučeno kontaktovat vašeho prodejce, který vám poskytne všechny potřebné informace. Vyjměte dva šroubky z krytu (V3020). Odejměte snímatelný kryt (921C). Pomocí plochého šroubováku vyjměte ochranný kryt upevňujících šroubů (921CV). Pomocí klíče TORX (CLET30) a nástavce (750R) vyjměte dva upevňující šrouby (906V). Se svěrákem zacházejte opatrně. E. Odejměte Kit. Zašroubujte dva šroubky (V310). Na nůžky nasaďte kit Medium. Zašroubujte, bez utahování, dva upevňující šrouby (906V). Pomocí klíče TORX (CLET30) a nástavce (750R) utáhněte dva šrouby háku (906V). Se svěrákem zacházejte opatrně. Nasaďte ochranný kryt na upevňující šrouby (921CV). Nasaďte držák na snímatelný kryt (921CMS). Zašroubujte šroubek (V310TF). Zuby pastorku a ozubeného kola namažte mazivem pro extrémní výkon (952GA). Nasaďte snímatelný kryt (921CM) Kit Medium. Zašroubujte dva šroubky (V316). Povolte šroub (V56TB). Odšroubujte matici (810E) o čtvrt otáčky. Pomocí mazací pistole (952P) namažte sadu mazacím šroubem (809B), dokud se mazivo neobjeví mezi čepelí a maticí (810E). Utáhněte matici (810E). Utáhněte šroubek (V56TB). Abyste mohli začít nářadí používat, vyhledejte kapitolu s názvem „Zapojení do napájení“ na straně 7 v návodu k použití nářadí. Pokud budete potřebovat seřídit pootevření či překrývání, vyhledejte kapitolu s názvem „Seřízení pootevření/překrývání čepele“ na straně 16 v návodu k použití nářadí. Dbejte na pečlivé uchování všech dílů. U vindt een montagevideo op de website: www.infaco.com Verwijder de twee schroeven van de kap (V3020). Verwijder de afneembare kap (921C). Verwijder de beschermkap van de haakschroeven met een platte schroevendraaier (921CV). Verwijder de twee schroeven van de haak (906V) met behulp van de TORX-sleutel (CLET30) en het verlengstuk (750R). Draai de bankschroef voorzichtig aan. E. Verwijder de Kit Standard. Draai de twee schroeven weer vast (V310). Plaats de Kit Medium op de snoeischaar. Plaats de twee haakschroeven terug zonder vast te draaien (906V). Draai de twee haakschroeven (906V) vast met de TORX-sleutel (CLET30) en het verlengstuk (750R). Draai de bankschroef voorzichtig aan. Plaats de beschermkap op de haakschroeven (921CV). Verwijder het hulpstuk van de afneembare kap (921CMS). Draai de twee schroeven vast (V310TF). Smeer het rondsel en de tandheugel in met vet voor maximale prestaties (952GA). Plaats de afneembare kap (921CM) van de Kit Medium. Draai de twee schroeven weer vast (V316). Draai de schroef los (V56TB). Draai de moer (810E) een kwartslag los. Gebruik de vetspuit (952P) om de kit te smeren via de vetplug (809B) tot er vet verschijnt tussen het blad en de moer (810E). S. Draai de moer (810E) vast. T. Draai de schroef vast (V56TB). Lees pagina 7 van de gebruikershandleiding ‘Inschakelen’, om het toestel weer in gebruik te nemen. Raadpleeg pagina 16 van de gebruikershandleiding van het toestel om de “halve opening/kruising van het lemmet’ in te stellen. Denk eraan om de onderdelen te bewaren. 커버에서 두 개의 나사(V3020)를 제거합니다. 탈착식 커버(921C)를 제거합니다. 일자 드라이버를 사용하여 후크 나사(921CV)에서 보호 커버를 제거합니다. TORX 키(CLET30)와 익스텐션(750R)을 사용하여 후크(906V)에서 두 개의 나사를 제거합니다. 바이스를 적당히 조입니다. E. 가지치기 가위 키트를 제거합니다. 두 개의 나사(V310)를 조입니다. 중형 키트를 전지 가위에 배치합니다. 두 개의 후크 나사(906V)를 고정하지 않고 나사를 조입니다. TORX 키(CLET30)와 익스텐션(750R)을 사용하여 두 개의 후크 나
Open the catalog to page 1All INFACO catalogs and technical brochures
 electro'liv 12v
24 Pages
 V5000
24 Pages
 tying machine At1000/36
36 Pages
 Manual tying machine AT1000
36 Pages
 Brochures tying machine AT1000
24 Pages
 ELECTROCOUP F3020 User guide
36 Pages
 olive harvesters
24 Pages

Archived catalogs
 Brochures POWERCOUP PW3
28 Pages
 Brochures hoof kit F3020
16 Pages
- Olive rake
- Vineyard pruning shears
- Electric pruning shears
- Electric olive rake
- Lightweight pruning shears
- Left-handed pruning shears
- Precision pruning shears
- Connected control system
- Tying tool
- Harvesting pruning shears
- Battery-powered pruning shears
- Telescopic pruning shears
- Bypass blade pruning shears
- Pruning shears with position lock
- Compact pruning shears
- Long-reach pruning shears
- Electric vine binder
- Hoof trimmer
- Viticulture vine binder