


- Company
- Products
- Catalogs
- News & Trends
- Exhibitions
tying machine At1000/36
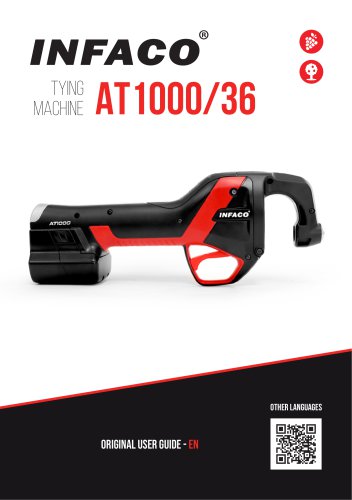
tying machine At1000/36
- Operation: Instructions for opening the top cover and preparing the tying machine for use.
- Yearly Maintenance: Recommended annual checks include cleaning the machine, checking clearances and bearings, replacing parts if necessary, and lubricating gears.
- Troubleshooting: Steps to resolve issues such as failed ties and twine jams, including cleaning and checking the wire condition.
- Transport Precautions: Ensure the assembly is disconnected and the battery is secured in its case.
- Inter-seasonal Storage: Recharge the battery before storage and keep the equipment in a dry location within specified temperature ranges.
- Disconnect the battery during non-tying operations and follow specific safety measures to prevent accidents.
- Use appropriate equipment when working at heights and avoid using the machine in hazardous conditions.
- The warranty covers defects under normal use and requires registration with INFACO.
- Exclusions include damage from improper maintenance, use of non-INFACO parts, and unauthorized repairs.
Catalog excerpts

tying machine other languages original user guide - EN 1
Open the catalog to page 1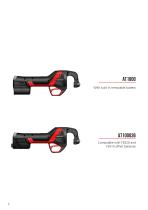
AT1000 With built in removable battery AT100036 Compatible with F3020 and F3015 offset batteries
Open the catalog to page 2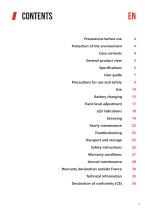
General product view 5 Twist level adjustment 17 Warranty declaration outside France 30
Open the catalog to page 3
IMPORTANT. Read all the safety warnings and all the instructions. Failing to heed warnings and follow instructions may lead to an electric shock, a fire and/or serious injury. Keep all warnings and instructions for future reference. In the warnings, the term "tool" refers to your battery powered electric tool (with power cord). Observe all country-specific waste disposal rules and regulations. > Power tools must not be disposed of with household refuse. > The device, accessories and packaging must be taken to a recycling centre. > Ask the approved INFACO dealer for up-to-date information on the...
Open the catalog to page 4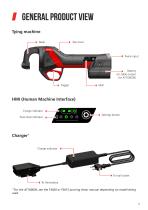
General product view Tying machine Top cover Twine input Battery (or cable output for AT100036) Trigger HMI (Human Machine Interface) Charge indicator Twist level indicator Settings button Charger* Charge indicator To wall outlet To the battery For the AT100036, see the F3020 or F3015 pruning shear manual depending on model being used
Open the catalog to page 5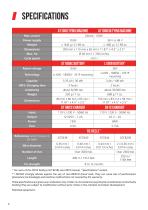
* For users of the F3015 battery (ref: 831B), see F3015 manual, ”Specifications ” section. ** INFACO strongly advises against the use of non-INFACO brand reels. They can cause loss of performance (premature tie breakage) and machine malfunctions not covered by the warranty. These specifications are given as an indication only. Under no circumstances may they be considered as contractually binding.They are subject to modification without prior notice in the interests of product development. Patented equipment.
Open the catalog to page 6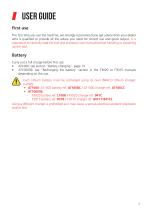
The first time you use the machine, we strongly recommend you get advice from your dealer who is qualified to provide all the advice you need for correct use and good output. It is imperative to carefully read the tool and accessory user manuals before handling or powering up the tool. Carry out a full charge before first use: • AT1000: see section "Battery charging", page 13 • AT100036: see "Recharging the battery" section in the F3020 or F3015 manuals depending on the use. Each lithium battery must be recharged using its own INFACO lithium charger, namely: Using a different charger is prohibited...
Open the catalog to page 7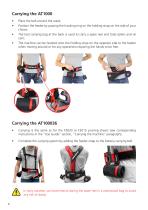
• Place the belt around the waist; • Position the feeder by passing the hooking ring on the holding strap on the side of your choice; • The tool carrying bag at the back is used to carry a spare reel and tools (pliers and oil can); • The machine can be hooked onto the holding strap on the opposite side to the feeder when moving around or for any operations requiring the hands to be free. Carrying the AT100036 • Carrying is the same as for the F3020 or F3015 pruning shears (see corresponding instructions in the "Use Guide" section, "Carrying the machine" paragraph); • Complete the carrying system...
Open the catalog to page 8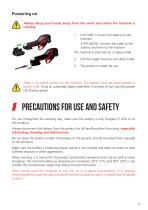
Powering on Always keep your hands away from the work area when the machine is running. 1. • AT1000: Connect the battery to the machine • AT100036: Connect the cable to the battery and then to the machine The machine is switched on in sleep mode. 2. Pull the trigger twice to exit sleep mode. There is no on/off button on the machine. The battery must be disconnected to power it off. It has an automatic sleep mode after 3 minutes of non-use (the power LED flashes green). Precautions for use and safety For use throughout the working day, make sure the battery is fully charged (3 LEDs lit on the...
Open the catalog to page 9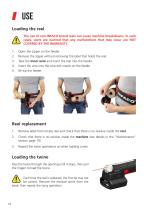
The use of non-INFACO brand reels can cause machine breakdowns. In such cases, users are warned that any malfunctions that may occur are NOT COVERED BY THE WARRANTY. 1. Open the zipper on the feeder. 2. Remove the staple without removing the label that holds the reel. 3. Take the inner wire and insert the reel into the feeder. 4. Insert the wire into the wire exit nozzle on the feeder. Reel replacement 1. Remove label from empty reel and check that there is no residue inside the reel. 2. Check that there is no residue inside the machine (see details in the "Maintenance" section page 19). 3. Repeat...
Open the catalog to page 10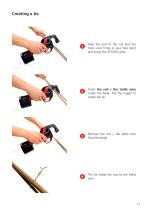
Take the end of the rod and the trellis wire firmly in your free hand and bring the AT1000 close. Insert the rod + the trellis wire inside the beak. Pull the trigger to create the tie. Remove the rod + the trellis wire from the beak. The tie holds the rod to the trellis wire.
Open the catalog to page 11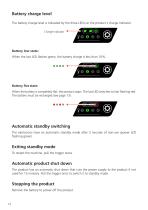
Battery charge level The battery charge level is indicated by the three LEDs on the product’s charge indicator. Charge indicator Battery low state: When the last LED flashes green, the battery charge is less than 10%. Battery flat state: When the battery is completely flat, the product stops. The last LED switches to fast flashing red. The battery must be recharged (see page 13). Automatic standby switching The electronics have an automatic standby mode after 3 minutes of non-use (power LED flashing green). Exiting standby mode To restart the machine, pull the trigger twice. Automatic product...
Open the catalog to page 12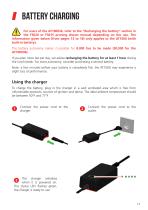
Battery charging For users of the AT100036, refer to the "Recharging the battery" section in the F3020 or F3015 pruning shears manual depending on the use. The information given below (from pages 13 to 16) only applies to the AT1000 (with built-in battery). The battery autonomy makes it possible for 8,000 ties to be made (30,000 for the AT100036). If you plan more ties per day, we advise recharging the battery for at least 1 hour during the lunch break. For extra autonomy, consider purchasing a second battery. Note: a few minutes before your battery is completely flat, the AT1000 may experience...
Open the catalog to page 13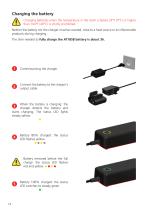
Charging batteries when the temperature in the room is below 32°F (0°C) or higher than 104°F (40°C) is strictly prohibited. Neither the battery nor the charger must be covered, close to a heat source or to inflammable products during charging. The time needed to fully charge the AT185B battery is about 3h. O Connect the battery to the charger's output cable. OWhen the battery is charging: the charger detects the battery and starts charging, The status LED lights steady yellow. O Battery 80% charged: the status LED flashes yellow. Battery removed before the full charge: the status LED flashes...
Open the catalog to page 14All INFACO catalogs and technical brochures
 electro'liv 12v
24 Pages
 V5000
24 Pages
 Manual tying machine AT1000
36 Pages
 Brochures tying machine AT1000
24 Pages
 ELECTROCOUP F3020 User guide
36 Pages
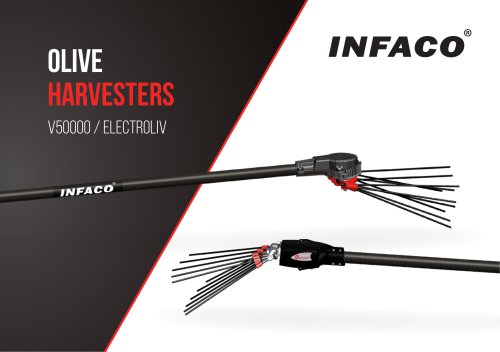 olive harvesters
24 Pages
Archived catalogs
 kit medium
2 Pages
 Brochures POWERCOUP PW3
28 Pages
 Brochures hoof kit F3020
16 Pages
- Olive rake
- Vineyard pruning shears
- Electric pruning shears
- Electric olive rake
- Lightweight pruning shears
- Left-handed pruning shears
- Precision pruning shears
- Connected control system
- Tying tool
- Harvesting pruning shears
- Battery-powered pruning shears
- Telescopic pruning shears
- Bypass blade pruning shears
- Pruning shears with position lock
- Compact pruning shears
- Long-reach pruning shears
- Electric vine binder
- Hoof trimmer
- Viticulture vine binder