- Catalogs
- Unverferth Mfg.
- 6-WHEEL STEER FIELDRUNNER HEADER TRANSPORT


6-WHEEL STEER FIELDRUNNER HEADER TRANSPORT
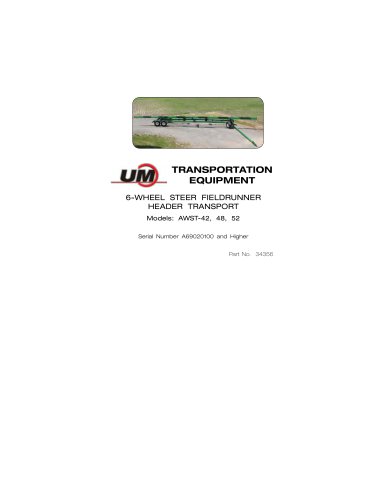
6-WHEEL STEER FIELDRUNNER HEADER TRANSPORT
The document is a technical manual for the 6-Wheel Steer Fieldrunner Header Transport models AWST-42, 48, and 52, starting from serial number A69020100. It emphasizes safety and provides instructions for operating, adjusting, and servicing the machine. The serial number is located on the left-hand side of the rear axle assembly.
The manual includes specifications and illustrations based on the information available at the time of writing. Specifications are subject to change due to ongoing improvements. Warranty information is provided, stating a one-year coverage for material and workmanship defects.
This section covers general hazard information, safety decals, and instructions to follow before servicing, operating, and transporting the equipment. It includes guidelines for wearing protective equipment and preparing for emergencies.
The setup section provides a checklist and general instructions for assembling the machine, including details on shipping bundles, frame, tires, wheels, rest bracket, upper rest bar, tongue, and light bar installation. Electrical setup is also covered.
Operational guidelines include hitching, initial adjustments, positioning the head on transport, and adjustments for various components like the upper rest bar, rest brackets, and light bar. It also covers tie-down packages and grain platform knife storage.
Maintenance instructions cover lubrication points, wheel bearings, tongue removal, storage, wheel and tire care, brake cleaning, and inspection. It includes procedures for adjusting wheel toe-in and troubleshooting brakes, along with electrical schematics.
This section lists components for various parts of the machine, including tongue, hitch kit, electrical components, steering hinge, frame, spindle, hub, brake cluster, support arm, and light bar components. It also includes optional components and tie-down parts.
The document emphasizes the importance of operator responsibility in accident prevention. Key safety measures include understanding and following safety instructions, wearing protective equipment, and ensuring all safety decals are visible and legible.
During operation, it is crucial to regulate speed according to conditions, maintain control, and avoid leaving the vehicle unattended with the engine running. The document specifies a maximum transport speed of 20 mph.
The setup section provides a detailed checklist and instructions for assembling the 6-Wheel Steer Fieldrunner. It includes steps for inspecting and preparing the unit, such as power washing to prevent corrosion and checking tire pressure.
The document lists the components included in shipping bundles, such as wheels, tires, upper bars, and light bar assemblies. Each item is associated with a part number and model compatibility.
Detailed instructions are provided for assembling the frame, including positioning axles, attaching support swivels, and securing brace tubes. The document specifies the use of safe lifting devices and provides diagrams to assist with the assembly process.
This document provides detailed assembly instructions for the 6-Wheel Steer Fieldrunner, focusing on various components such as the frame, tires and wheels, rest bracket, upper rest bar, tongue, and light bar installation.
The frame assembly involves attaching the lower part of the center support bracket using specified carriage bolts and locknuts. It is crucial to adjust the vertical height using the hitch pin and to tighten all hardware according to the torque chart in the maintenance section.
The document emphasizes the importance of using a safe lifting device to install wheels and tires onto axles. Proper torque specifications for wheel nuts/bolts are highlighted to avoid loss of control and machine damage.
Instructions for positioning the rest brackets on the support swivel with a truss bar are provided. The use of specific carriage bolts, washers, and CAM handle weldments is detailed to secure the assembly.
The upper rest bar is factory assembled for draper and corn heads, with alternative mounting options for grain platforms. The assembly involves securing the upper tube with straps and adjusting the bar position for specific applications.
The tongue is attached to the front axle frame with specific bolts and nuts, ensuring proper torque. The document advises against loosening bolts to align the lock plate and provides guidance on routing the tongue wire harness.
The installation process for the light bar includes routing the wire harness through the frame and securing it with flange screws and nuts. Optional extender brackets are available for wider heads.
The electrical section covers the routing and connection of the brake wire harness, ensuring no wires are pinched or cut during installation. The use of fish tape and other tools is recommended for proper wire routing.
General Information
Before hitching the header transport to any vehicle, ensure the pin hole is located close enough to the rear of the vehicle drawbar to allow the header transport tongue clevis to swing 90 degrees right or left without interference.
Horizontal Adjustment
Support the upper rest bar with a safe lifting device and remove the horizontal adjustment pin. Reposition the bar to the desired location and install the pin.
Ensure the transport is attached to the towing vehicle or that the wheels are blocked before positioning the header on transport.
To position the header over the transport unit, ensure it is not lowered. Adjust the upper bar and verify the adjustment by pulling back up.
Adjust the width of the rear light bar by loosening the wire harness and sliding the light bar sections as needed.
Ensure adequate swing clearance for the header transport tongue to prevent damage. Check tire clearance to avoid damage during turns.
Use heavy-duty strap assemblies to secure the header to the transport. Ensure straps are in good condition and comply with load limits.
Electric brakes function similarly to automotive drum brakes but are actuated by electromagnets. Proper brake performance requires regular checks of wheel nut torque, brake adjustment, tire pressure, and brake synchronization.
Regular lubrication is essential for header transport and bearing longevity. Use SAE multi-purpose grease for lubrication points such as tongue hitch pins, steering hinge pins, and axle spindle bearings.
Regular maintenance is crucial for the 6-Wheel Steer Fieldrunner. Key components such as rear axle spindle bearings, rear axle pivots, steering bearings, and wheel bearings require annual inspection and lubrication.
Lubricate seal lip with grease. Rotate hub while placing it on the spindle, ensuring no damage to the seal lip.
Regular checks should include tongue pivot pin, tie rod connections, hardware tightness, tire pressure, and wheel lug nuts.
After each season, inspect welds on axles, adjust tie rods for toe-in, and rotate tires diagonally for improved tire life.
Tighten various nuts to specified torque values to ensure proper alignment and function.
Before storage, repaint chipped areas, inspect and replace damaged parts, and store the implement inside on support stands.
Ensure wheel nuts/bolts are properly torqued to prevent control loss and damage. Tire pressure should be checked and maintained according to manufacturer specifications.
Toe-in adjustments are necessary after initial use and should be checked regularly.
Brakes should be inspected and serviced annually or more frequently with increased usage.
Regular checks of voltage and amperage are necessary to ensure proper brake function.
The document outlines procedures for diagnosing electrical issues in brake systems.
Regular inspection of brake drums is necessary, focusing on the drum surface and armature surface.
Electric brake malfunctions often stem from electrical failures. Use voltmeters and ammeters for troubleshooting.
The document provides detailed electrical schematics for various components, including front and rear brake harnesses and light harnesses.
A complete torque chart for Grade 5 capscrews is provided, detailing the required foot-pounds and newton meters for different sizes.
The document lists parts for various components of the 6-Wheel Steer Fieldrunner, including tongue components, hitch kits, and electrical components.
This document provides a detailed parts listing for the 6-Wheel Steer Fieldrunner, including various components such as lower tube components, header rest bracket components, tie-down components, light bar components, wheel & tire components, and optional kits.
This section includes parts like tie rods, hex jam nuts, tie rod ends, cotter pins, slotted nuts, brace tube weldments, reflectors, support swivel weldments, collars, capscrews, elastic stop nuts, pin weldments, lock nuts, link castings, and tie rod extensions.
This section lists parts such as rest bracket assemblies, plates, CAM handle weldments, pins, side rest plates, bars, back stop weldments, decals, Belleville spring washers, carriage bolts, capscrews, elastic lock nuts, formed pins, flat washers, hairpin cotters, and plow bolts.
The tie-down assembly includes hitch pins, pipes, tie-down brackets, hook back plates, straps, ratchet buckles, carriage bolts, flat washers, knobs, and locknuts.
This section details the light bar assembly, including formed channels, wiring harnesses, logos, zip ties, light combo lamps, reflectors, hex nuts, lock washers, machine screws, flange screws, cable ties, formed plate covers, flange nuts, light mount assemblies, capscrews, locknuts, self-drilling screws, panel nuts, VIN packages, and brackets.
This section provides information on wheel and tire assemblies, valve stems, and wheels.
The document includes optional kits such as the upper bar mount light bar bracket and the upper bar support extension arm kit for specific draper models.
This section outlines the draper kit for John Deere hinge drapers, including tongue drop bracket assemblies, rest pad weldments, riser weldments, collar weldments, mounting plate weldments, rest pad weldments, square tube weldments, bent pins, hairpin cotters, capscrews, lock nuts, upper bar landing pad kits, carriage bolts, hat straps, self-drilling screws, flat washers, and tie-down bracket assemblies.
For the most current parts listing, users are directed to visit the Unverferth website. The document serves as a comprehensive guide for identifying and ordering parts for the 6-Wheel Steer Fieldrunner.
Catalog excerpts
TRANSPORTATION EQUIPMENT 6-WHEEL STEER FIELDRUNNER HEADER TRANSPORT Models: AWST-42, 48, 52 Serial Number A69020100 and Higher Part No. 34356
Open the catalog to page 1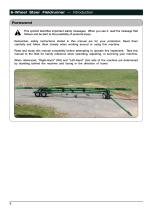
6-Wheel Steer Fieldrunner — Introduction Foreword This symbol identifies important safety messages. When you see it, read the message that follows and be alert to the possibility of personal injury. Remember, safety instructions stated in this manual are for your protection. Read them carefully and follow them closely when working around or using this machine. Read and study this manual completely before attempting to operate this implement. Take this manual to the field for handy reference when operating, adjusting, or servicing your machine. When referenced, “Right-Hand” (RH) and “Left-Hand”...
Open the catalog to page 2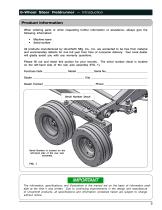
6-Wheel Steer Fieldrunner — Introduction Product Information When ordering parts or when requesting further information or assistance, always give the following information: • • Machine name Serial number All products manufactured by Unverferth Mfg. Co., Inc. are warranted to be free from material and workmanship defects for one full year from time of consumer delivery. Your local dealer will gladly assist you with any warranty questions. Please fill out and retain this portion for your records. The serial number decal is located on the left-hand side of the rear axle assembly (FIG. 1). Purchase...
Open the catalog to page 3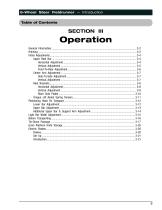
6-Wheel Steer Fieldrunner — Introduction Table of Contents
Open the catalog to page 5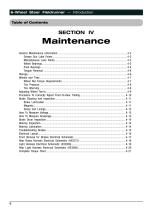
6-Wheel Steer Fieldrunner — Introduction Table of Contents
Open the catalog to page 6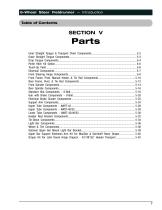
6-Wheel Steer Fieldrunner — Introduction Table of Contents
Open the catalog to page 7
6-Wheel Steer Fieldrunner — Introduction Notes
Open the catalog to page 8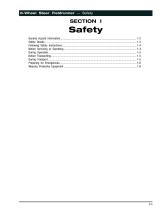
6-Wheel Steer Fieldrunner — Safety
Open the catalog to page 9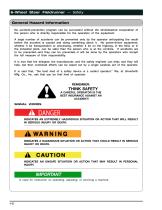
6-Wheel Steer Fieldrunner — Safety General Hazard Information No accident-prevention program can be successful without the wholehearted cooperation of the person who is directly responsible for the operation of the equipment. A large number of accidents can be prevented only by the operator anticipating the result before the accident is caused and doing something about it. No power-driven equipment, whether it be transportation or processing, whether it be on the highway, in the field, or in the industrial plant, can be safer than the person who is at the controls. If accidents are to be prevented--and...
Open the catalog to page 10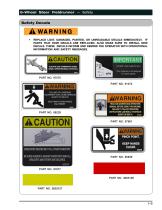
6-Wheel Steer Fieldrunner — Safety Safety Decals • replace lost, damaged, painted, or unreadable decals immediately. if parts that have decals are replaced, also make sure to install new decals. these decals inform and remind the operator with operational information and safety messages.
Open the catalog to page 11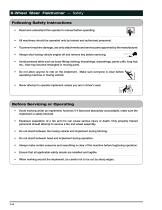
6-Wheel Steer Fieldrunner — Safety Following Safety Instructions • Read and understand this operator’s manual before operating. All machinery should be operated only by trained and authorized personnel. To prevent machine damage, use only attachments and service parts approved by the manufacturer. Always shut towing vehicle engine off and remove key before servicing. Avoid personal attire such as loose fitting clothing, shoestrings, drawstrings, pants cuffs, long hair, etc., that may become entangled in moving parts. Do not allow anyone to ride on the implement. Make sure everyone is clear before...
Open the catalog to page 12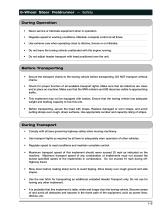
6-Wheel Steer Fieldrunner — Safety During Operation • Never service or lubricate equipment when in operation. Regulate speed to working conditions. Maintain complete control at all times. Use extreme care when operating close to ditches, fences or on hillsides. Do not leave the towing vehicle unattended with the engine running. Do not adjust header transport with head positioned over the unit. Before Transporting • Secure the transport chains to the towing vehicle before transporting. DO NOT transport without chains. Check for proper function of all available transport lights. Make sure that...
Open the catalog to page 13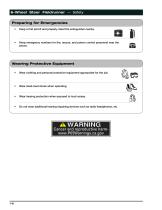
6-Wheel Steer Fieldrunner — Safety Preparing for Emergencies • Keep a first aid kit and properly rated fire extinguisher nearby. Keep emergency numbers for fire, rescue, and poison control personnel near the phone. Wearing Protective Equipment Wear clothing and personal protective equipment appropriate for the job. Wear steel-toed shoes when operating. Wear hearing protection when exposed to loud noises. Do not wear additional hearing impairing devices such as radio head
Open the catalog to page 14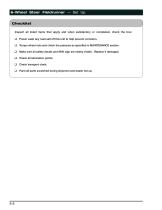
Inspect all listed items that apply and when satisfactory or completed, check the box: □ Power wash any road salt off this unit to help prevent corrosion. □ Torque wheel nuts and check tire pressure as specified in MAINTENANCE section. □ Make sure all safety decals and SMV sign are clearly visible. Replace if damaged. □ Check all lubrication points. □ Check transport chain. □ Paint all parts scratched during shipment and dealer set up.
Open the catalog to page 16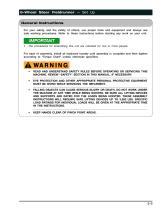
6-Wheel Steer Fieldrunner — Set Up General Instructions For your safety, and the safety of others, use proper tools and equipment and always use safe working procedures. Refer to these instructions before starting any work on your unit. The procedures for assembling this unit are intended for two or more people. For ease of assembly, install all hardware loosely until assembly is complete and then tighten according to “Torque Chart” unless otherwise specified. read and understand safety rules before operating or servicing this machine. review “safety” section in this manual, if necessary. eye...
Open the catalog to page 17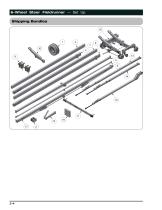
6-Wheel Steer Fieldrunner — Set Up Shipping Bundles 15
Open the catalog to page 18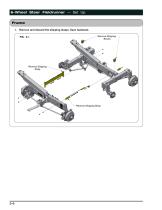
6-Wheel Steer Fieldrunner — Set Up Frame 1. Remove and discard the shipping straps. Save hardware. FIG. 2-1 Remove Shipping Blocks Remove Shipping Strap Remove Shipping Strap
Open the catalog to page 20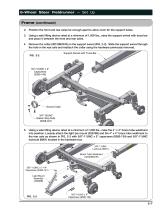
6-Wheel Steer Fieldrunner — Set Up Frame (continued) 2. Position the front and rear axles far enough apart to allow room for the support tubes. 3. Using a safe lifting device rated at a minimum of 1,000 lbs., raise the support swivel with truss bar and place it between the front and rear axles. 4. Remove the collar (30123B/G/R) on the support swivel (FIG. 2-2). Slide the support swivel through the hole in the rear axle and reattach the collar using the hardware previously removed. Support Swivel with Truss Bar Swivel Collar 3/4"-10UNC Elastic Stop Nuts (9398-021) 5. Using a safe lifting device...
Open the catalog to page 21All Unverferth Mfg. catalogs and technical brochures
 15-SERIES
4 Pages
 LEGACY
4 Pages
 AT6020
4 Pages
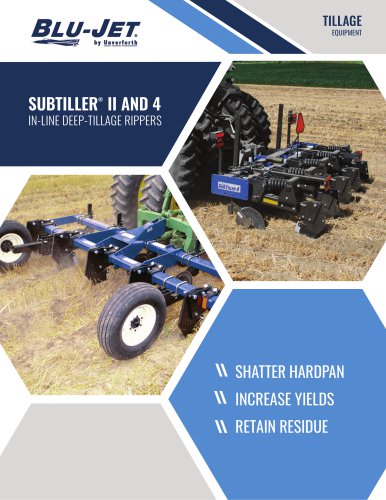 SUBTILLER® II AND 4
4 Pages
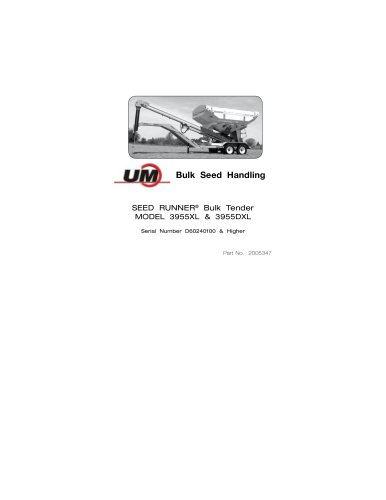 Bulk Seed Handling
202 Pages
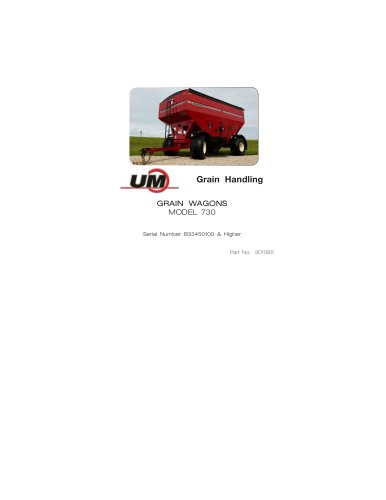 GRAIN WAGONS
102 Pages
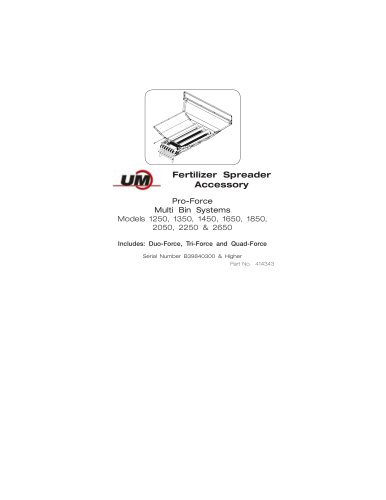 Pro-Force Multi Bin Systems
106 Pages