- Catalogs
- Vet Ray Technology
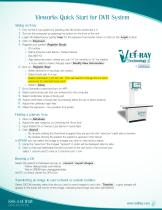
- DVR Digital Quick Start Guide
DVR Digital Quick Start Guide

DVR Digital Quick Start Guide
This document provides a quick start guide for using the Vieworks DVR System for taking X-rays in a veterinary setting. It outlines the steps for operating the system, registering patients, and managing X-ray images.
- Turn on the X-ray system and computer.
- Log into MaxxVue with the password 'xray'.
- Register the patient by entering ID, name, sex, and age.
- Select the animal type, body part, and orientation for the X-ray.
- Adjust the generator panel settings and collimator light field.
- Make the exposure using the foot pedal.
- Access the database and adjust the year range if necessary.
- Search using the patient ID or owner's last name.
- View images by double-clicking thumbnails or patient entries.
- Use the viewer to adjust and display images in various formats.
- Select the patient in the database and follow the convert/export images dialog.
- Ensure viewer is unchecked for OFA CDs.
- Select DICOM transfer and choose the destination site.
- Click 'Transfer' to send images, indicated by a gray triangle on the image.
For support, contact 888.4.VETRAY or visit www.VetRay.com.
Catalog excerpts
Vieworks Quick Start for DVR System Taking an X-ray Turn on the X-ray system by pressing the ON button (looks like a 1) Turn on the computer by pressing the button on the front of the unit Login into MaxxVue by typing ‘xray’ for the password and press return or click on the Login button Click on Exposure Register your patient Register Study a. ID number b. Name (Owners Last Name / Patient Name) c. Sex (M/F/O) d. Age (assumes years, unless you use “m” for months or “w” for weeks) • If you need to make changes select Modify View Information 6. Click on Register Step a. Select animal to x-ray (dog, cat, exotic) b. Select body part to x-ray c. Select orientation, LAT, DV, VD. (You will need to change this for each exposure for selected body part) d. Select Close 7. Go to Generator panel and turn on APR 8. Select same body part that you entered into the computer 9. Select centimeter range of body part 10. Adjust centimeter of body part by pressing either the up or down buttons 11. Adjust the collimator light field 12. Make the exposure – two position foot pedal Finding a patients X-ray Click on Database Adjust the year range by un-checking the “from box” Input Patient ID or Owners Last Name in name field Click Search a. By double clicking the thumbnail image(s) they are put into the “view box” (right side of screen) b. By double clicking the patient the patient is opened in the Viewer In VIEWER you can select the image or images you wish to view and/or adjust 5. Using the “view box” the images “opened” in order will be displayed side by side 6. Click on the user selectable format tool (next to the 3x3 tool) in the tool bar and select 1 column and 2 rows or 2 columns and 1 row Burning a CD Select the patient in Database and go to convert / export images Follow dialog box(s) commands Text in GREEN are changeable fields NOTE: un-check viewer for OFA CDs Transferring an image to your network or outside facilities Select DICOM transfer, select the site you wish to send images to and click Transfer , a gray triangle will appear in the lower left corner of the image, indicating that image has been transferred.
Open the catalog to page 1All Vet Ray Technology catalogs and technical brochures
 BASIC VET
2 Pages
 Premium Vet
2 Pages
 DYNAVET
4 Pages
 MultiVet 3-in-1
4 Pages
 My Vet Cloud
2 Pages
 VXvue Quick Guide
2 Pages
 QXLink Viewer User Guide
5 Pages
 Canon Vet Quick Start
2 Pages
- Agricultural software
- Data management software
- Real-time software
- Veterinary X-ray system
- Digital veterinary X-ray system
- Domestic animal veterinary X-ray system
- Cloud software
- Veterinary radiography flat panel detector
- Flat panel detector
- Direct conversion flat panel detector
- Data acquisition software
- Fixed veterinary X-ray system
- Mobile veterinary X-ray system
- Data display systems software
- Digital flat panel detector
- Veterinary X-ray system with table
- Horse veterinary X-ray system
- Analog veterinary X-ray system
- 17 x 17 flat panel detector
- 14 x 17 flat panel detector